Bars

Ooey Gooey Bars

I have a bit of an odd situation.

Ooey-Gooey bar

Since I imagine some of you might be food people, I’m hoping to pick your brain. In return for said brain picking, I’ll offer you a family favourite, something that has morphed from a type-writered page of  dog eared community cookbook.

This summer, to keep me busy, Mr. Ginge planted me a garden. Just a little row along the side of the house where I could grow some herbs and a few veggies.

Ooey Gooey Bar - GB

I am a complete gardening newb. Kinda just winging it and hoping to get a successful harvest. I may have, however, underestimated my tomato plant.  It’s flipping ginormous, and is covered with little green tomatoes, which are just starting to colour and ripen on the mass of vines. Now that is all fine and dandy, except my little cherry tomatoes are literally exploding. I’ll go to pick on of the vine, only to find it split from top to bottom on the side. I’ll pick another, slightly under-ripe globe, only to look down a moment later to find it burst and juices leaking over my hand.

My tomatoes literally can’t contain themselves.  They are the Cadbury cream egg goo of the tomato world.

Is this normal? Is this just an effect of my monstrously huge tomato plant? Or are my tomatoes just too beautiful to live?

Inquiring minds want to know.

ooey gooey chomp

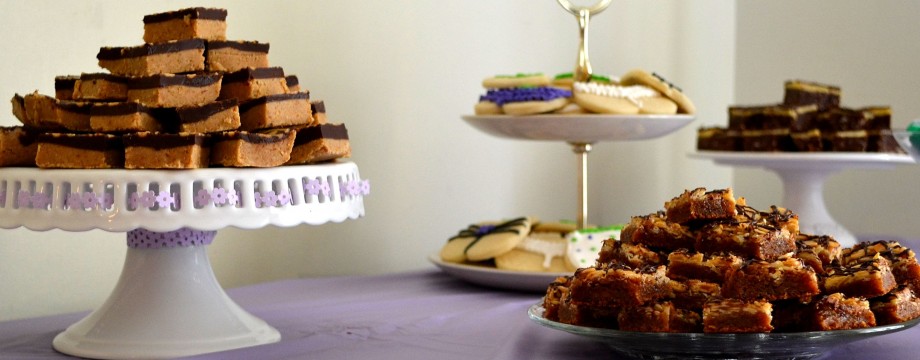
Ooey Gooey Bars (a.ka. Seven layer bars *)

makes 1 8×8 pan

  • 1/2 cup butter, melted
  • 1 1/4 cup graham crumbs
  • 1/2 cup chopped pecan
  • 1pkg chocolate chips
  • 1/2 cup shredded coconut
  • 1 can sweetened condensed milk
  1. Preheat the oven to 350°F.
  2. In the 8×8 pan, mix together the graham crumbs and the butter. When all the crumbs are coated, press them firmly into the bottom of the pan with the back of a spoon.
  3. Sprinkle the pecans evenly over the base, followed by the chocolate chips then the coconut . Pour over the can of sweetened condensed milk, trying to evenly cover the toppings.
  4. Bake in the preheat oven for 25-30 minutes, or until the milk is bubbly and golden brown.
  5. Let set for at least a half an hour, then slice into squares. Understand why they are ooey gooey.

Gone
* I lightly adapted these from a coverless blue community cookbook that as been on my Mom’s shelf for as long as I can remember. The best credit I can give is to F. MacPherson. 

Categories: Bars | Tags: , , , | 4 Comments

Nutella Crispy Rice Rolls

Sometimes you just need a classic and easy treat. Like a cereal treat.

Nutella Crispy Roll - GB

And then sometimes you need to take that classic crispy treat, and load it up with some chocolate. Then roll it all up and drizzle it with more chocolate.  And then just as the chocolate starts to set you slice it up and scarf it down like the crispy-rice-chocolate vehicle that it is.

Nutella roll - GB

And the best part? Scarfage can happen in like half an hour.

Awesome sauce.

nutella roll slice - GB

Nutella Crispy Rice Rolls

makes about 12 rolls

  • 3 cups puffed rice cereal ( Please excuse the holiday cereal. It was cheap )
  • 2 cups marshmallows ( about 1/2 a package)
  • 2 Tbsp butter
  • 1 tsp vanilla
  • 1 1/2 cups Nutella
  • 1/2 cup chocolate chips
  1. Line a 9×13 jelly roll pan with plastic wrap and set aside.
  2. In a sauce pan, melt together the marshmallow and butter, stirring to melt evenly. Once melted, stir in the vanilla. 
  3. Immediately stir in the cereal, coating it evenly with the marshmallow mixture. While it’s still warm, dump it onto the prepared pan, pressing into all the corners, until you have a thin even layer.  Let this set for a couple minutes.
  4. When the cereal is cool, but not completely set, spread the Nutella over top, leaving a bit along a long edge plain.
  5. Roll cereal treats by holding the edge of the plastic wrap with your thumbs, then lift up the cereal treats and roll towards the other edge, mking sure to lift up the plastic wraps as you go.  Once it was rolled, I wrapped it tightly in plastic wrap, the set it in the fridge to help firm it up. 
  6. Meanwhile, melt the chocolate chips. You could you a double boiler or the microwave, but make sure not to burn it. Burning chocolate is not a nic smell.

I burned the chocolate.

7. Drizzle the melted ( and not burned) chocolate over the top of the roll. Stick it back in the fridge for a few minutes to let it firm up, then slice and enjoy.

Sooooo simple and so hard to stop eating. 🙂

– Mel

——————————————-

I linked this recipe up to The Weekend Potluck and Strut Your Stuff Saturdays! Click the link to heck out more great recipes!

Categories: Bars | Tags: , , , | 2 Comments

M&M Blondies

It’s time for an episode of ” Mel-is-Embarrassing-and-Can’t-Be-Taken-Anywhere”.

m&M blondies

Grocery Store Edition.

Monday, Mr. Ginge and I decided we would pick up the fixings for pizza after we ran some errands around town. Coffees in hand, we wander around the store, picking up this and that for dinner and the upcoming week, including a very fresh and delicious looking box of donuts.  As we were headed to the check out, Mr Ginge decides he wants olives on his pizza, do heads back to the deli to scoop some out.

Because the basket was full and rather heavy, I set it down on the floor in front of the stand, as we discussed the pizza merits of one olive versus the next. As he scooped, I set my half-empty coffee cup on the ledge, so that I could answer my dinging phone. Well, I don’t know whether I didn’t set it on the ledge enough, or that I hit it with my coat sleeve, but my coffee ended up airborne, landing unpside down in my basket of groceries all over the fresh box of donuts.

DSC_0025

I was able to grab it before the entire contents ended up in my basket, but I still ended up with a mess, and a man with a look of utter disbelief on  his face, frantically looking around to see if anyone could tell if he was with the nimrod beside him.

You’d think that would be bad enough, but no.  I didn’t have any paper towel, or tissues, or napkins, or any bits of absorbent paper lingering in my purse, so I had to leave it as is. Which means I had to put by sopping wet ad very sticky groceries up on the belt and have the poor cashier ring them through. I was kinda hoping that she wouldn’t notice, or, you know, soggy groceries weren’t all that uncommon of a thing, but apparently not. Having dealt with the mess that was my purchases, she whips out some paper towels and starts wiping down my groceries, in front of her very busy line, not saying a word.

Needless to say I couldn’t wait to leave. Neither could Mr Ginge.

These have nothing to do with that grocery store trip. There was a mix that I used to make often when I was younger that would always get gobbled up quickly by my family. I was looking to recreate the taste in a from-scratch way and this is what I came up with. My mom, who remembered them the most, agreed that they were spot on.

M&M blondies

M&M Blondies

makes one 8×8 pan

Adapted from Better Homes and Gardens The Ultimate Cookie Book

  • 1/3 cup butter
  • 3/4 cup brown sugar
  • 1/4 cup white sugar
  • 1 egg
  • 1 tsp vanilla
  • 1 cup whole wheat pastry flour
  • 3/4 tsp baking powder
  • 1/4 tsp baking soda
  • 1/2 cup chocolate chips
  • 1 cup M&M’s candies ( Please don’t substitute. We tried it once with Smarties, and it was a whole different animal)
  1. Preheat the oven to 350°F. Grease a 8×8 pan and set aside.
  2. In a large saucepan over medium, melt together the butter and the sugar, stirring until the sugar dissolves. Remove from the heat. Beat in the egg and the  vanilla until combined.
  3. In a bowl, whisk together the flour, baking powder and baking soda.  Dump it into the butter mixture and stir until combined.
  4. Fold in both the M&M’s and the chocolate chips into the batter.
  5. Pour the batter into the prepared pan, spreading with an offset spatula to even out.
  6. Bake in the preheated oven for 25-30 minutes or until golden brown and the centre is set.
  7. Let cool in the pan for 10 minutes, then cut into bars while warm, and transfer to a wire rack to cool completely.

With a tall glass of milk and one of these bars, I just might be able to forget my latest embarrassing episode.

-Mel

Categories: Bars | Tags: , , | 2 Comments

Zucchini Cake Bars

It has been feeling like fall around here.

I know technically there are still a few days left of summer. But I really think Mother Nature has other ideas. Leaves are changing and falling. The dry heat of the summer has bee replaced with the cool wet that I associate with fall. It feels like fall here.

Which means we’ve been craving fall foods.  Come cooler weather, I crave the wonderful aroma of fall spices, cinnamon and nutmeg and ginger and cloves. Add a wood burning stove and it smells exactly how Gran’s kitchen would smell this time of year.

So when Kristen from Frugal Antics of a Harried Homemaker chose zucchini and brown sugar as ingredients for this month’s Improv Challenge, I knew I wanted to do something with lots of those spices, and full of comfort.

What I came up with were these moist bars, that before they were even gone, my mom and sister were requesting again.

Zucchini  Cake Bars

makes 12 bars or 1 8×8 pan, adapted from Better Homes and Gardens Ultimate Cookie Book

For the Bars:

  • 3/4 cups flour
  • 1/2 tsp baking powder
  • 1/2 tsp cinnamon
  • 1/4 tsp nutmeg
  • 1/4 cup butter
  • 1/3 cup brown sugar
  • 1/8 cup honey
  • 1 egg
  • 1 tsp vanilla
  • 1 cup shredded zucchini, squeezed dry.
  • 1/4 cup cinnamon chips
  • 1/4 cup chopped pecans

For the Cinnamon Frosting:

  • 1/4 cup butter
  • 1 cup icing sugar
  • 1 tsp cinnamon
  • 2-3 tsp milk to thin as needed
  1. Preheat your oven to 350° F. Grease and lightly flour an 8×8 in square pan.
  2. In a large bowl, combine the flour, baking powder and spices. Set aside for later.
  3. In a medium sauce pan, melt together the butter, brown sugar and honey. Remove from heat, let cool a little, then beat in the egg and the vanilla.
  4. Add the butter mixture to the flour mixture and stir with a wooden spoon just to combine. Add the shredded and squeezed dry zucchini, pecans and cinnamon chips.
  5. Pour into the prepared pan and  bake for 25-30 minutes, or until a tooth pick comes out clean. Let cool in the pan for about then ten minutes, then turn out onto a wire rack to cool completely.
  6. In a small bowl, beat together the butter, icing sugar and cinnamon, adding the milk as needed to get the right consistency. Spread the frosting onto the completely cooled bars. Cut into bars and serve.

Don’t forget to check out the other great recipes using zucchini and brown sugar!

-Mel


—————————–

I’ve also linked this post to The Weekend Potluck,   On the Menu Monday, and Strut Your Stuff Saturdays! Click the links to check out more great recipes!

Love Bakes Good Cakes
Categories: Bars | Tags: , , , , , | 21 Comments

Nanaimo Bars

Enter Exhibit A: The Nanaimo Bar.

The elusive no-bake confection that appears almost universally on dessert trays around the community. Known by it’s distinct brown and yellow striping, it’s easily spotted among the assorted brownies, wafers and marshmallow squares.

That is, until you go to choose your dessert selection, where they appear to have done a vanishing act. Nary a square to be seen among the other treats.  The outlook is even worse for those who go for a second helping of the lunch fare. Only crumbs remain beside the date squares and store bought chocolate chip cookies.

For those clever enough to have raided the dessert table before sitting down to your triangle of tuna salad, beware. Guard your nanaimo bar well. One wayward glance or untimely trip to refill your styrofoam  cup, and yours too will have disappeared as swiftly as the others, leaving only an errant crumb and a subtle smudge of yellow icing.  Trust no one in protection of this rare treat, even those closest to you, as few can resist  it’s seductive allure.

And if you, the host, have pre-emptively reserved a few to indulge in later, hide them well in the depths of your refrigerator, as no place is safe from the threat of Nanaimo bar kidnapping.

Nanaimo Bars

makes on 8×8 pan, adapted from Mom’s old photocopy, yellowed from age, with a grocery list on the back and no directions.

For the base:

  • 1/2 cup butter
  • 1/4 cup white sugar
  • 1/3 cup cocoa powder
  • 1 tsp vanilla
  • 1 egg, lightly beaten
  • 2 cups graham cracker crumbs
  • 1/2 cup shredded coconut
  • 1/2 cup chopped walnuts (optional)
For the filling
  • 1/4 cup butter, softened
  • 2 tbsp custard powder ( like Birds) or instant vanilla pudding powder
  • 2 cups icing sugar
  • 2-3 tbsp milk

For the top

  • 3 oz semi sweet chocolate ( or a scant 1/4 cup of chocolate chips if you prefer)
  • 1 tsp butter
  1. Make the base: Line an 8×8 square pan wit wax or parchment paper, making sure to let some hang over the edge. In a large stainless steel or heat proof glass bowl ( or in the top of a double boiler), combine the butter, sugar, cocoa, vanilla and egg.  Set over some barely simmering water, stirring constantly until the butter has melted and the mixture is thick – about 2 or 3 minutes. 
  2. In another bowl, combine the graham cracker crumbs, coconut and walnuts. Pour the chocolate mixture over top and mix well. Press evenly into the bottom of the prepared pan, and set into the fridge to chill for about 30 minutes. 
  3. Make the filling: In another bowl, cream together the butter and the custard powder. Gradually add the icing sugar, adding milk as needed until it’s smooth and spreadable. Spread over the bottom layer and return to the fridge for another 30 minutes or until firm.
  4. Make the topping: In a small saucepan melt together the butter and the chocolate, stirring until completely melted and smooth. Pour the chocolate mixture evenly over the filling, spreading gently with an offset spatula to fill in any gaps or corners. Chill until the chocolate is set but not hard, lift out of the pan and slice into squares. If the chocolate hardens too much, then just let it sit for a few minutes on the counter until it softened then slice. Store any leftovers (well hidden) in the fridge.
Guard them well.
-Mel
———————————-
I linked this recipe up to The Weekend Potluck and Strut your Stuff SaturdaysClick the link for more great recipes!

Categories: Bars | Tags: , , , | 19 Comments

On the Quest for the Recipe….

Sometimes I get creative. Throw some ingredients in a bowl and see how they turn out. Sometimes it’s good, sometimes not.

Sometimes Mr. Ginge, or my parents ( I bake for them most often) are craving something I have never heard of, let alone know ho to make. Like Queen Elizabeth cake, or Gran’s Chocolate Fudge icing.

Or these:

Marzipan bars.

So here is the story behind these.

I had asked Dad to start thinking about what kind of treat he would like for Father’s Day.  Last year he chose eclairs. The year before that was Banana Cake. While he chose Trifle for this year, these treats came up.  Apparently, both my Gran and Grandma used to make them.  Fortunately for me, they described them pretty well, and I was able to find a reasonably close recipe here.

Pastry bottom, jam & almondy cake, all topped with icing. Very sweet, but yum.

I won’t lie. It was late, so I cheated and used a store bought crust. I also put 1/2 a tsp of almond extract into the cake layer, just for an extra bit of almond kick.

Apparently they turned out well (they disappeared quickly!), but I already have a few tweaks in mind to make them better!

Enjoy!

-Mel

Categories: Bars | Tags: , | 1 Comment

A Little Chocolate Never Hurt…..

So this past week has been an eventful one for me.  🙂

Work on Tuesday brought a smile to make face and for the whole week. Thursday, before the Easter long weekend, I had brought some of my chocolate chip cupcakes in. A co-worker brought the left over home for her daughter. Since there would have been too many treats for just her daughter, she shared them with her daycare. She then told me that they were all amazed by the mini cupcakes and loved them. It brought a smile to my day, and reminded me why I love to bake. 🙂

This past week also brought the Royal Wedding. Sadly, I did not get up a 4am to watch the nuptials. I did, however, Google her dress and the cakes when I got home. 🙂 Personal favorite was the chocolate biscuit grooms cake. It was a fun idea, and it was gorgeous. It did look like a beautiful wedding from the pictures I browsed through. ( Oh what 34 million can do!)

In more personal events, today one of my good friends is moving 7 hours north for a job with one of the gold mines. It’s bittersweet, because I’m happy for her ( she just finished her degree!), and yet sad because she is sooo far away. Despite this, I wished her the best of luck there, and promised that the girls would trek it up there at least once in her 2 year contract.

An adventure like that would require lots of fuel, both for the car and the driver. And what fuels a bunch of 20 something females ( or at least this bunch of females…)? Chocolate.

While these treats would be great for a long road trip like that, I actually whipped these up for Mr. Ginge, who also loves a chocolate treat. Particularly when they come in the form of crispy treats! If you are not a fan of white chocolate, these would be equally as good with dark or milk chocolate pieces too.

Triple Chocolate Crispy Rice Treats

makes a 9×13 pan

  • 6 c cocoa crispy rice cereal
  • 1 c white chocolate pieces
  • 1 bag marshmallows
  • 1/4 c butter
  • Chocolate drizzle
  1. Mix the cereal and the white chocolate in a big bowl.
  2. In a sauce pan, or in the microwave, melt the butter and the marshmallows together.
  3. While the marshmallows are still hot, pour them over the cereal and mix until you have no dry cereal left.
  4. Press into a lightly greased 9×13 pan ( Don’t forget to grease! You will thank me later)
  5. Drizzle with the chocolate drizzle and pop them in the fridge to firm up
  6. Once set, take them out and cut in to squares.

Chocolate drizzle

Start by warming up a few table spoons of heavy cream, either in a sauce pan or in the microwave, just to the point of boiling.  Remove from heat ( or the microwave) and stir in some chocolate chips, a little at a time, melting them in the hot cream until you get a slightly thick and smooth consistency. The general guide line is equal parts cream to chocolate, but I get better results is I slowly work the chocolate into the cream.

Enjoy!

-Mel

Categories: Bars, Dessert | Tags: , , | Leave a comment

Create a free website or blog at WordPress.com.