Posts Tagged With: Coconut

Oatmeal Scotchies

Sooo….  November.

Artie's Oatmeal Scotchies

Hardly believe we are almost half way through it. 😉

And while everyone south of the border is gearing up for Thanksgiving, I’m gearing up for an entirely different event.

Doctor Who.

It’s finally almost here! (Omigosh have you seen the latest trailer? I’ve basically squeeled with excitement!)

And guess what!

Oatmeal Scotchies

This recipe has absolutely nothing to do with it. In fact it is from another show, Warehouse 13, that Mr. Ginge got me hooked on, and we’ve been obsessively watching in the Doctor Who downtime.

Anyway the premise of the show is these secret agents track down these “artifacts” that have been imbued with strange powers from the people to whom they once belonged. Much adventure ensues.

I’ll let you in on a little secret. Right from the pilot, Artie’s favourite snack have been Oatmeal Scotchies. And since I am in the habit of recreating foods from my favourite shows…..

Oatmeal Scotchies WH-13
Oatmeal Scotchies

makes about two dozen cookies

adapted from allrecipes.com

*A note – From the show and other recipes, I’m guessing this is supposed to be a crispier cookie, but since I like a thicker, chewier cookie, I’ve adapted this recipe to suit my taste*

  • 1/2 cup butter, softened
  • 1/2 cup brown sugar
  • 1/4 cup white sugar
  • 1 egg
  • 1/2 tsp orange extract
  • 1 tsp baking soda
  • 1 cup flour
  • 1 cup rolled oats
  • 1 cup butterscotch chips
  • 1/2 cup coconut.
  1. Preheat the oven to 350°F
  2. In a large bowl, cream together the butters and the sugars, until light and fluffy. Add the egg and the orange extract, continuing to beat until combined.
  3. In another bowl, combine the soda, flour and oats. Gradually add it to the butter mixture, mixing in the last with a wooden spoon if needed. Stir in the chips and the coconut.
  4. Drop by rounded tablespoonfuls on to a cookie sheet, then bake in the preheated oven for 10-12 minutes. Let them cool for a couple minutes on the pan, then move to a wire rack to cool completely. Serve with juice or milk ( because falling off the wagon may not be the best choice at this point)

On a scarier thought, six weeks till Christmas ( and six weeks till regeneration!)

-Mel
Categories: Cookies | Tags: , , | Leave a comment

Ooey Gooey Bars

I have a bit of an odd situation.

Ooey-Gooey bar

Since I imagine some of you might be food people, I’m hoping to pick your brain. In return for said brain picking, I’ll offer you a family favourite, something that has morphed from a type-writered page of  dog eared community cookbook.

This summer, to keep me busy, Mr. Ginge planted me a garden. Just a little row along the side of the house where I could grow some herbs and a few veggies.

Ooey Gooey Bar - GB

I am a complete gardening newb. Kinda just winging it and hoping to get a successful harvest. I may have, however, underestimated my tomato plant.  It’s flipping ginormous, and is covered with little green tomatoes, which are just starting to colour and ripen on the mass of vines. Now that is all fine and dandy, except my little cherry tomatoes are literally exploding. I’ll go to pick on of the vine, only to find it split from top to bottom on the side. I’ll pick another, slightly under-ripe globe, only to look down a moment later to find it burst and juices leaking over my hand.

My tomatoes literally can’t contain themselves.  They are the Cadbury cream egg goo of the tomato world.

Is this normal? Is this just an effect of my monstrously huge tomato plant? Or are my tomatoes just too beautiful to live?

Inquiring minds want to know.

ooey gooey chomp

Ooey Gooey Bars (a.ka. Seven layer bars *)

makes 1 8×8 pan

  • 1/2 cup butter, melted
  • 1 1/4 cup graham crumbs
  • 1/2 cup chopped pecan
  • 1pkg chocolate chips
  • 1/2 cup shredded coconut
  • 1 can sweetened condensed milk
  1. Preheat the oven to 350°F.
  2. In the 8×8 pan, mix together the graham crumbs and the butter. When all the crumbs are coated, press them firmly into the bottom of the pan with the back of a spoon.
  3. Sprinkle the pecans evenly over the base, followed by the chocolate chips then the coconut . Pour over the can of sweetened condensed milk, trying to evenly cover the toppings.
  4. Bake in the preheat oven for 25-30 minutes, or until the milk is bubbly and golden brown.
  5. Let set for at least a half an hour, then slice into squares. Understand why they are ooey gooey.

Gone
* I lightly adapted these from a coverless blue community cookbook that as been on my Mom’s shelf for as long as I can remember. The best credit I can give is to F. MacPherson. 

Categories: Bars | Tags: , , , | 4 Comments

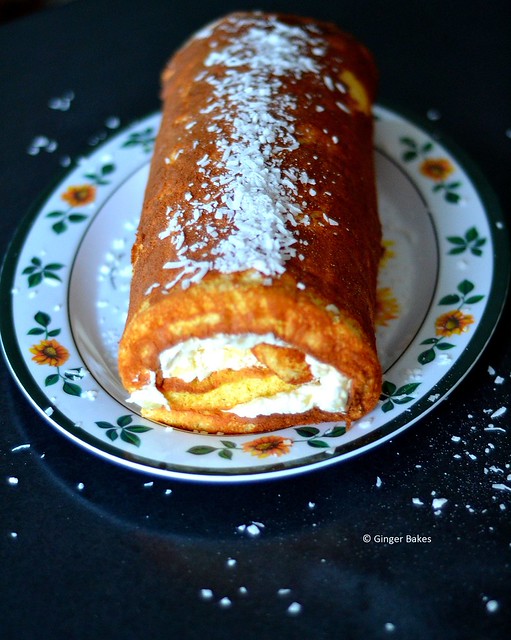
Pina Colada Cake Roll

Ok. I think it’s time for another episode of “Mel-is-embarrassing-and-can’t-be-taken-anywhere”

Pina Colada Cake

Tim Horton’s edition.

My sister recently upgraded her phone, so I have adopted her old beater of a phone.  Now this phone is an all touch screen phone, which meant a whole new learning curve for me, when I only had just recently adopted a phone with a keyboard. Many frustrations have ensued.

Pina Colada Cake Slice

Anyway, while waiting in line at the coffee shop, I was texting someone, and I was making a mess of it. Button mash galore.  So I got frustrated. And yelled at my phone. In the busy line. In the general direction of an unsuspecting man, who thought my cries of frustration were directed at him.

Oh yes.  By all appearances, I yelled at a complete stranger.

Oh and did I  mention that a co-worker was in the line as well and saw all this go down.

Needless to say, I needed cake after work.

Pina Colada Cake Roll

Pina Colada Cake Roll

serves 8-10

For the cake:

  • 4 eggs, separated
  • 3/4 cups sugar, divided
  • 2 Tbsp coconut rum or  rum extract
  • 1 Tbsp canola oil
  • 2/3 cup flour, sifted
  • 1 cup shredded coconut

For the filling:

  • 1/4 cup flour
  • 1 cup milk
  • 1 cup butter, softened
  • 2 cups icing sugar
  • 1 can crushed pineapple, drained

For the Cake:

  1.  Preheat the oven to 350°F. Grease and line a 15 x 10 jelly roll pan with parchment paper, then grease the parchment paper. Set ‘er aside.
  2. In a large bowl, beat the eggs yolks until doubled in volume and lemony coloured. Gradually beat in 1/4 cup of sugar. Stir in the oil and the rum.  Set it aside
  3. In another large bowl, whip the egg whites until you get soft peaks. Gradually add the remaining sugar, a tablespoon at a time, until you get stiff and glossy peaks. Gently fold the egg whites into the egg yolk mixture.
  4. Add the flour and the coconut to the egg mixture and gently fold until just combined.  Spread the batter gently into the pan. Bake in the preheated of for 10-12 minutes or until the cake springs back when you touch it lightly.
  5. While the cake is still warm, cover it with a tea towel dusted with icing sugar, then loosely roll it up starting from a short side. Move it to a cooling rack, and let it cool completely in the tea towel.

For the Filling:

  1. In a small saucepan, combined the flour and 1/4 cup of milk, whisking until smooth. Cook over gentle heat, until thickened, slowly adding the remaining milk. You want this mixture to be as thick as pudding, and expect it to thicken up some more as it cools. Remove from heat and let cool completely. 
  2. Meanwhile, beat together the butter and the icing sugar until light and fluffy. Beat in the cooled milk mixture and the crushed pineapple.

To Fill the Cake:

  1. Gently unroll the cooled cake, peeling off the parchment paper and tea towel. Spread the filling evenly over the cake, leaving  about an inch at each end. Roll the cake back up and set seam side down onto a serving plate.
  2. Sprinkle the top with some extra shredded coconut, then slice and serve.

I like cake. Cake is good.

-Mel

Categories: Cake and Cupcakes | Tags: , , , , | 5 Comments

Peanut Butter Balls

How did it become December 21st?

pb balls - GB

Everything has been such a whirlwind this week and it just seems like I’ve blinked and I am already facing the start of the last weekend before Christmas! Geesh.

Fortunately I do have all my shopping done ( and I’m pretty sure that if I don’t it’s not going to get done, because I am not facing those crowds!), however this week I have been helping some of my other family members get their shopping done.  I don’t mind lending a helping hand, however, now that I am done my shopping, I keep seeing amazing things in the store for the people on my list or (worse) myself.

peanut butter ball - GB

I think it’s a secret ploy by stores. Let’s put out all of the “ok” stuff or ” they’d appreciate that” stuff for all the early bird shoppers. Then in the last couple of weeks before the holidays, let’s put out all of the “OMG” or ” THIS IS TOTALLY PERFECT” stuff. That way when the shoppers are out with family members, or just doing their normal “I-just-ran-out-of-toilet-paper” shopping, they see all of this amazing stuff and are absolutely forced to buy it.

Like honestly, my shopping budget is not blown by my normal gift shopping. It’s blown by all these little amazing things that I find in the last days before Christmas.  Oh well. The only one that suffers really is my bank account.

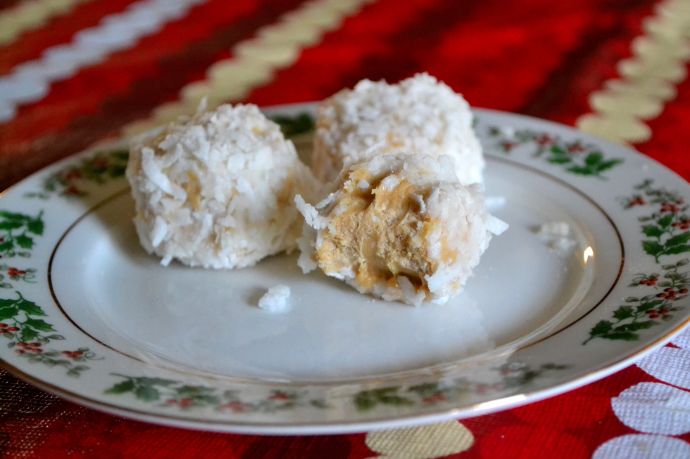
Anyways, my shopping is beyond done, but I’m still trying to get some of my holiday baking done. These I whipped up a bit earlier in the  week when I had a spare bit of time. They come together quickly and are super delicious.  I’ve adapted them from my Grandma’s recipe (her original recipe had dates in them. Barf), and they are one of both my brothers and my dad’s favourites. If you are a big peanut butter fan, then you may want to double the recipe, because they will go quickly!

pb bite - GB

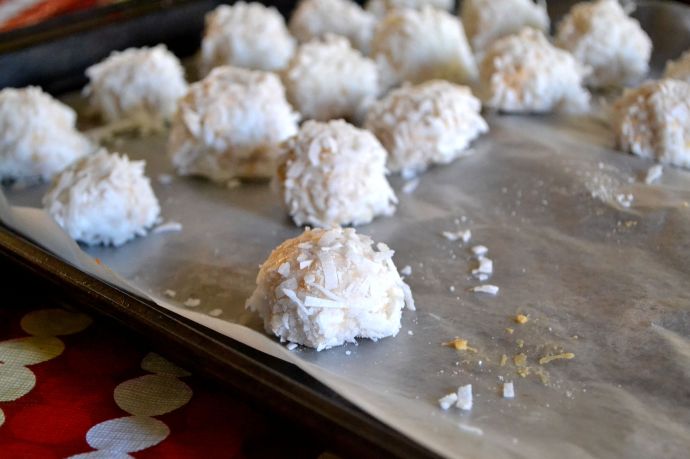
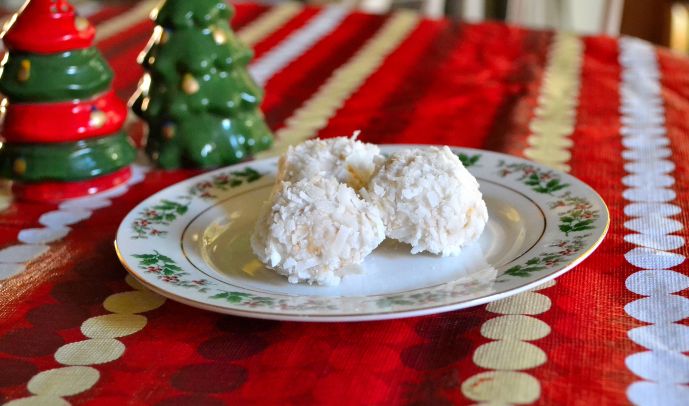
Peanut Butter Balls 

makes about 20 balls

  • 1 cup smooth peanut butter
  • 2 cups icing sugar, divided
  • 3-6 tbsp of milk (or water)
  • 1 1/2 cups shredded coconut
  1. In a bowl, combine the peanut butter and 3/4 cup of the icing sugar. You should end up with a soft ‘dough’. 
  2. With damp hands, roll the dough into 1 inch/ 2.5 cm ball, setting them on a tray lined with wax paper. If you are finding that the dough is too soft or is sticking to your fingers, set them in the freezer for about 10 minutes. Once it is all rolled out, chill them for at least 30 minutes.
  3. Meanwhile, make a thin icing with the remaining icing sugar and 3 Tbsp of milk.  If your icing is still thick, add the remaining milk, one tablespoon at a time.
  4. Lightly coat each of the chilled balls in the thin icing, then immediately roll in the shredded coconut. Set back on the wax paper lined tray and chill to set. Once they have set, you can move them too a container. Store in the fridge.

My last minute shopping trip bought our cat a festive new sweater!

christmas keels - GB

– Mel

—————————

I linked this recipe up to:

Categories: Candies | Tags: , , , , , | 2 Comments

Nanaimo Bars

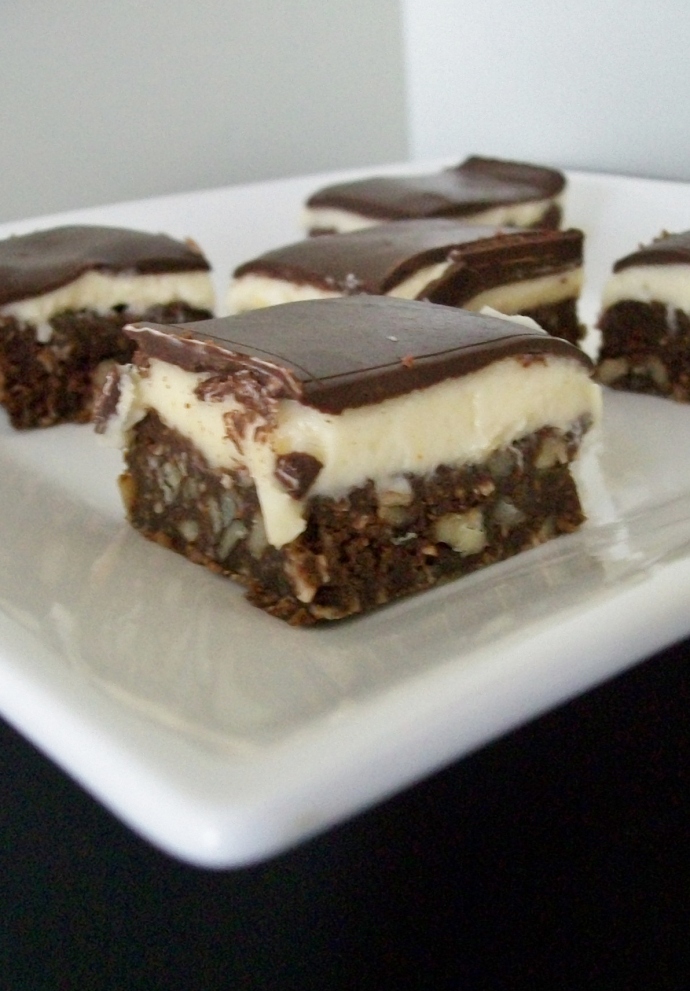
Enter Exhibit A: The Nanaimo Bar.

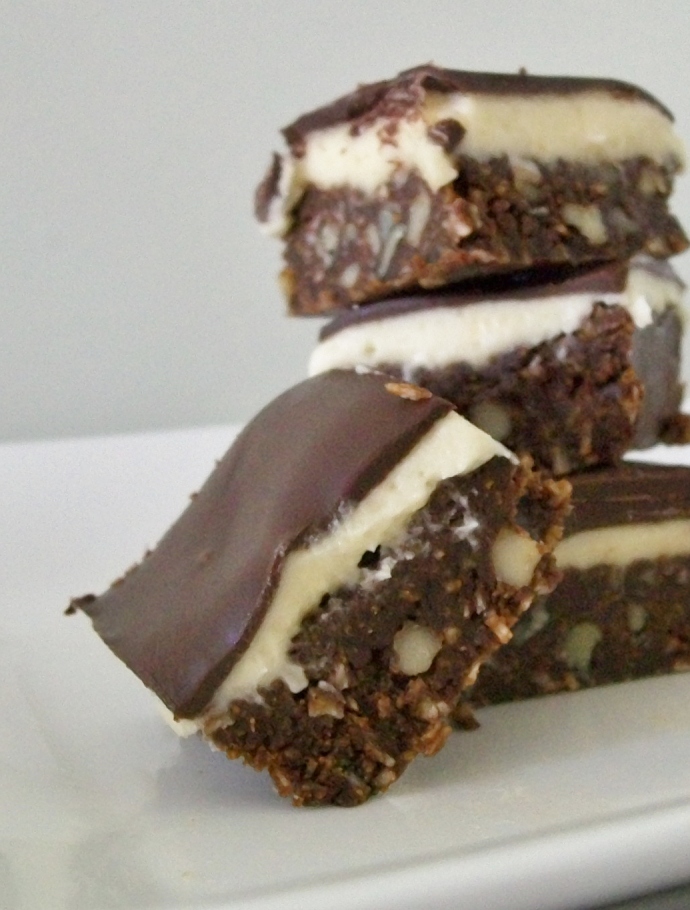
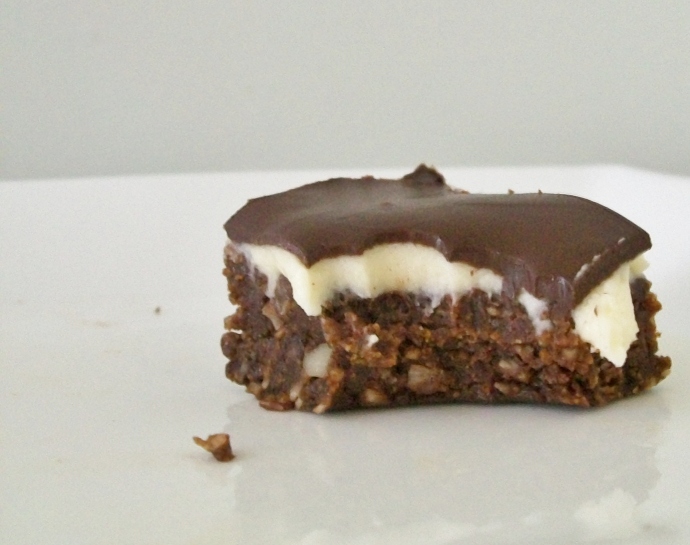
The elusive no-bake confection that appears almost universally on dessert trays around the community. Known by it’s distinct brown and yellow striping, it’s easily spotted among the assorted brownies, wafers and marshmallow squares.

That is, until you go to choose your dessert selection, where they appear to have done a vanishing act. Nary a square to be seen among the other treats.  The outlook is even worse for those who go for a second helping of the lunch fare. Only crumbs remain beside the date squares and store bought chocolate chip cookies.

For those clever enough to have raided the dessert table before sitting down to your triangle of tuna salad, beware. Guard your nanaimo bar well. One wayward glance or untimely trip to refill your styrofoam  cup, and yours too will have disappeared as swiftly as the others, leaving only an errant crumb and a subtle smudge of yellow icing.  Trust no one in protection of this rare treat, even those closest to you, as few can resist  it’s seductive allure.

And if you, the host, have pre-emptively reserved a few to indulge in later, hide them well in the depths of your refrigerator, as no place is safe from the threat of Nanaimo bar kidnapping.

Nanaimo Bars

makes on 8×8 pan, adapted from Mom’s old photocopy, yellowed from age, with a grocery list on the back and no directions.

For the base:

  • 1/2 cup butter
  • 1/4 cup white sugar
  • 1/3 cup cocoa powder
  • 1 tsp vanilla
  • 1 egg, lightly beaten
  • 2 cups graham cracker crumbs
  • 1/2 cup shredded coconut
  • 1/2 cup chopped walnuts (optional)
For the filling
  • 1/4 cup butter, softened
  • 2 tbsp custard powder ( like Birds) or instant vanilla pudding powder
  • 2 cups icing sugar
  • 2-3 tbsp milk

For the top

  • 3 oz semi sweet chocolate ( or a scant 1/4 cup of chocolate chips if you prefer)
  • 1 tsp butter
  1. Make the base: Line an 8×8 square pan wit wax or parchment paper, making sure to let some hang over the edge. In a large stainless steel or heat proof glass bowl ( or in the top of a double boiler), combine the butter, sugar, cocoa, vanilla and egg.  Set over some barely simmering water, stirring constantly until the butter has melted and the mixture is thick – about 2 or 3 minutes. 
  2. In another bowl, combine the graham cracker crumbs, coconut and walnuts. Pour the chocolate mixture over top and mix well. Press evenly into the bottom of the prepared pan, and set into the fridge to chill for about 30 minutes. 
  3. Make the filling: In another bowl, cream together the butter and the custard powder. Gradually add the icing sugar, adding milk as needed until it’s smooth and spreadable. Spread over the bottom layer and return to the fridge for another 30 minutes or until firm.
  4. Make the topping: In a small saucepan melt together the butter and the chocolate, stirring until completely melted and smooth. Pour the chocolate mixture evenly over the filling, spreading gently with an offset spatula to fill in any gaps or corners. Chill until the chocolate is set but not hard, lift out of the pan and slice into squares. If the chocolate hardens too much, then just let it sit for a few minutes on the counter until it softened then slice. Store any leftovers (well hidden) in the fridge.
Guard them well.
-Mel
———————————-
I linked this recipe up to The Weekend Potluck and Strut your Stuff SaturdaysClick the link for more great recipes!

Categories: Bars | Tags: , , , | 19 Comments

Homemade Almond Joy Hearts

Look!

I made you a heart. Can you feel the love?

Since I discovered the little almond joy pieces last year, I have been obsessed. I want to make everything almond-joy flavored. I made cookies in the summer, but seeing as  Mr. Ginge doesn’t like anything with nuts in it, I have been hesitant to make anything else. But I’ve wanted to.

Valentines seemed like the perfect excuse.  And much to my surprise, my no-nuts-allowed-in-my-treats man eats them. No arm twisting needed. I swear! The explanation I get : Well they are just like Almond Joys.

Like him liking almond laced treats was common knowledge.

Homemade Almond Joy Hearts

Make 12 hearts

  • 1/4 c butter, melted
  • 1 c unsweetened shredded coconut
  • 1 to 1 1/2 c icing sugar
  • 1 tsp vanilla extract
  • 1-2 tbsp milk or cream
  • 24 whole natural almonds
  • 1 pkg milk chocolate chips
  1. In a bowl, mix together the first 5 ingredients. If the mixture is still a bit soft or runny, add more sugar. It should hold together and not be sticky.
  2. Line a sheet or plate with parchment. Shape a couple tablespoons of  the coconut mixture into a heart shape. I freehanded it, but you could always use a small cookie cutter as a mold. Press two hold almonds, with the tips together so that they also make a heart shape, into the coconut. Top with some more of the coconut to cover the almonds. Stick them in the fridge for several hours to firm up, or in the freezer for at least half an hour.
  3. Meanwhile, melt the chocolate chips in a large bowl. When firm, dip each of the hearts in chocolate so that they are completely covered, and set on a parchment lined sheet. Set back in the fridge to allow the chocolate to firm up. One the chocolate is set, drizzle any remaining over top of the hearts, if desired. Store in the refrigerator.

Try not to eat them all in one sitting!

-Mel

Categories: Candies | Tags: , , , , | 1 Comment

Santa’s Whiskers

I have made a holiday discovery.

Fixing mangled lights on  pre-lit Christmas tree is not as simple of a task as it may seem. First, they are wrapped around those branches pretty good, so expect it to be a lengthy task. Second, you are almost guaranteed to find a tangled mess of lights waiting for you on the ground once you finally get them all off, so expect to spend the remainder of your night cursing at the ball of lights you are now trying to make sense of. Keep in mind as well that these strans of lights are not your typical strands of lights.

Then when you eventually manage to get them all straightened out, make sure you test each strand to make sure they work before you string them all back on the tree. Or you may end up like me where 4 of the 7 strings of lights you have just meticulously strung around the tree are out, not a one of them side by side.

Joy.

Lights are overrated, right?

These cookies were also a holiday discovery, however far more pleasant than the tree light fiasco of 2011. My mom found a similar recipe years back,made them, and loved them, but then later found out she lost the recipe. A  search online brought her no luck either. Then randomly one day while out shopping, I started flipping through a holiday cook book, when it was ripped from my hands, and mom pointed out this recipe.

I’ve tweaked the recipe to suit my taste,  but the flavor is exactly what Mom remembered

Santa’s Whiskers

adapted from Company’s Coming Most Loved Festive Baking

makes 50-60 cookies

  • 1 c butter, softened
  • 1 c sugar
  • 1 lg egg
  • 3/4 c red and green cherries, finely chopped
  • 2 tbsp milk
  • 2 1/2 cups flour
  • 1/2 cup chopped pecans
  • about a cup of flaked coconut
  1. In a large bowl, cream together your butter and sugar, until light and fluffy.
  2. Beat in the egg and the milk. Stir in the chopped cherries.
  3. Gradually add in the flour. Once combined and you have a nice dough, stir in the pecans
  4. Divide the dough in to two, then roll into 2″ logs (5 cm). Roll the log in the coconut, then wrap in plastic wrap and chill for a couple hours or overnight.
  5. When you are ready to bake, preheat the oven to 350°F.
  6. Slice the dough into 1/4 ” (6mm) and place them on a cookie sheet.Bake for 10-12 minutes or until the coconut on the edges start to brown. Let cool a few minutes on the sheet.
  7. Move to a wire rack, and let cool completely.

You can make the dough a couple days in advance, and the cooled cookies freeze wonderfully.

Enjoy!

-Mel

Categories: Cookies | Tags: , , , | 1 Comment

Some Choco-Coco-Almond Joy

So it seems that every time I bake lately, I am using almonds.

I hope that you like almonds. I really hope you aren’t allergic to nuts.

I apologize in advance if you are.

I also hope you like cookies.

So maybe I have been living under a rock for a while, but you don’t generally see Almond Joy candy bars in my neck of the woods.

However after one fateful trip to the bulk food store, their little candy pieces were discovered. So while munching away on my newly found treats, it got me thinking; these would be pretty good in cookie form.

And so I share with you this wonderful discovery.

And before you think I have lost my mind and have forgotten to add pictures of the cookies, my computer kicked the bucket last week. I’ll give you three guesses as to where my pictures were, and the first two don’t count. Needless to say, I have recently discovered the benefits of backing up my files regularly.

Double Chocolate Coconut and Almond Cookies

makes about  3 1/2 dozen cookies

  • about 1/2 c chocolate chips, melted
  • 2 1/2 c flour
  • 1/2 tsp soda
  • 1/4 tsp salt (I use kosher salt)
  • 1 c butter, softened
  • 3/4 c white sugar
  • 3/4 c packed brown sugar
  • 2 eggs
  • 2 tsp almond extract
  • 1/2 cup natural almonds, chopped
  • 1/2 cup shredded coconut
  • 1 heaping c chocolate chunks
  1. Preheat your oven to 325°F
  2. In a small bowl, melt your chocolate chips ( I used the microwave. Nuke them 30 seconds, give them a stir, then nuke them again for another 30 seconds). Set aside to cool.
  3. In another bowl, sift together your flour, salt, and soda. Set aside.
  4. In a big bowl this time, cream together your butter and the sugars until light and, well, creamy.
  5. Add your eggs, one at a time, followed by your extract.
  6. Slowly mix in your melted and cooled chocolate. (if you want your cookies to have a marbled look, gently stir the chocolate in at the end)
  7. Mix in your flour a little at a time, until it’s all combined
  8. Dump in your coconut, chocolate chunks, and almonds, and give your dough a mix until it’s all evenly distributed.
  9. Drop by about a tablespoon of dough onto a cookie sheet and bake for about 15-18 minutes.
  10. Let them cool a couple minutes on the pan, then transfer to a cooling rack, or if you can’t wait like me, scarf on down.

Best if served with a tall glass of cold (chocolate 🙂 ) milk.

-Mel

P.S. Don’t forget to subscribe!

Categories: Cookies | Tags: , , , | 5 Comments

Cookies and Worms…

Easter is coming up this weekend, and with it brings nice thoughts of spring. Lots of green grass, pretty spring flowers and egg hunts out in the garden. Apparently though, Mother Nature had other ideas.

As predicted, Sunday brought snow. And enough snow that it was actually starting to accumulate on the ground. This made for a very long and boring day at work. Apparently people don’t want to buy sun dresses and shorts for their kids when it’s snowing out. Who knew?

Since Sunday, it has been dull and dreary, either raining or threatening to. Rain means I don’t often get to see the osprey’s in their nests on the way home. 😦 However, I do live in Canada, and snow are rain are to be expected, if not anticipated in April.   On the bright side of all this rain, it brings out all the worms, which attracts the robins. After a rain, the front yard becomes a feeding frenzy. I kid you not. For reasons unknown to me, after the rain, the driveway becomes a veritable minefield of worminess. Fat ones, skinny ones, all squirming around on the pavement. If you need fishing bait, my driveway is where it’s at.

Because of the weather, I ended up spending most of the week inside. And decided to bake cookies. Yay!

If you have an afternoon to spend, these would be a great choice. A little finicky, especially if  you ice them with Royal Icing like I did. These are a family favorite. Mom used to make these all the time for Christmas, and they are a great spin on the classic sugar cookie.  Since Easter is just around the corner, I decided to go with an Easter theme.

Coconut Sugar Cookies

  • 3/4 c. butter, softened
  • 2/3 c. sugar
  • 2 eggs
  • 1/2 tsp almond extract
  • 1 3/4 c all purpose flour
  • 1 1/2 tsp baking powder
  • 1/4 tsp salt
  • 1 c finely shredded coconut ( I give the coconut a quick whirl in the food processor just to make it extra fine)
  1. Preheat your oven to 350°F
  2. Cream together your butter an sugar, until it’s light and fluffy
  3. Beat in your eggs one at a time, mixing well after each. Add the almond extract
  4. Sift together your dry ingredients, and gradually add it to the butter mixture.
  5. Stir in the coconut.
  6. Cover and chill the dough for several hours.
  7. After the dough has chilled, roll out the dough and cut with your favorite cookie cutters
  8. Bake for 8-10 minutes.
  9. Let the cookies cool completely, then ice or decorate as you choose.

While the original recipe calls for just a simple glaze, I fancied them up and used Royal Icing

Royal Icing

  • 4 tbsp meringue powder
  • 1/2 c water
  • about 4 c icing sugar
  • 3/4 tsp corn syrup
  • 1/4 tsp almond extract
  • food coloring of your choice.
  1. With a mixer, mix the meringue powder and water into foamy
  2. Slowly sift in the icing sugar. -Don’t skip the sifting! It makes an extra smooth and creamy icing!
  3. Once your sugar is all mixed in, add your corn syrup and extract.
  4. Keep mixing, on high, until you get stiff peaks in your icing.
  5. Add your colors, then pipe away!

Note: if you want to flood your cookies or your icing gets a bit stiff, just mix in a bit of water, a few drops at a time until you get the consistency that you are looking for.

Categories: Cookies | Tags: , , | 1 Comment

Blog at WordPress.com.