Posts Tagged With: dinner

Bacon Double Cheeseburger Pockets

Almost every Sunday morning, either Mr. Ginge or I roll out of bed, throw on some coffee and heat up a pan for breakfast.

bacon cheese burger pockets

Our usual rotation includes french toast, bacon and eggs, and sometimes pancakes thrown in. If we are really feeling fancy, we’ll head out to one of the local diners for breakfast.

So it goes with out saying that my initial idea for this month’s Improv Challenge, hosted by Kristen of Frugal Antics of a Harried Homemaker, was to make breakfast.  Except, I could think of anything that I really loved, and that honestly as a challenge.

bacon double cheeseburger pockets

When I noticed some pizza dough in the freezer it hit me. One of my favourite treats when I was a kids was bacon double cheeseburger pizzas. I would  literally beg my dad to order it instead of  the usual pepperoni. We’ve also been on a bit of a calzone kick, every once and a while picking one up when we’re out visiting friends. And with that the idea was born. With a quick egg wash, I had something both delicious and challenge worthy.

Cheeseburger pockets
Bacon Double Cheese Burger Pockets

makes 6 pockets

  • Homemade or store bought pizza dough ( I made my own, but after the disaster I made last time, I used the recipe out of my Kitchen Aid manual ) 
  • 1 lb ( 454 g) ground beef
  • 1 medium onion, chopped
  • 2 cloves of garlic, minced
  • 1/2 cup beef broth
  • 1/2 cup barbecue sauce
  • 1/4 cup ketchup
  • 2 Tbsp mustard
  • 6 strips of bacon, cooked till crisp
  • 3 cups shredded cheddar cheese, divided
  • 2 cups shredded pepper jack cheese
  • 1 egg, beaten
  1. Preheat the oven to 350° F/ 180 ° C. Line a cookie sheet with parchment paper.
  2. In a large pan, brown the meat, onions, and garlic together, until onions are translucent and meat is no longer pink. Drain any excess fat and return to the pan. Add the beef broth, barbecue sauce, ketchup and mustard to the pan, stirring to combine.  Simmer the mixture until it is thickened.
  3. Divide the pizza dough into 6 equal sections. On a lightly floured surface, roll out each into a round to about 6 inches/ 15 cm across. I find it easiest to use a rolling pin, but feel free to stretch it out by hand.  Divide the meat mixture between the six rounds. Top with a strip of bacon and 1/3 cup of each of the cheeses.
  4. Fold one edge of the round over, so that you end up with a half moon shape. To seal the pocket, gently press the edges together, then fold over. Transfer to the paper lined sheet.
  5.  Brush each of the tops with some of the beaten egg, making sure to cover along the seams. Sprinkle with the reserved cheddar cheese
  6. Bake in the preheated oven for about  15 minutes, or until the cheese has melted and the dough is golden brown. Let cool on the tray for about 5 minutes, then serve along side a fresh salad.

Don’t forget to check out what others have come up with using Eggs and Bacon!

– Mel


—————————-

I also linked this recipe to The Weekend Potluck and Strut Your Stuff Saturdays! Click the link to check out more great recipes!
Categories: Sandwiches and Side Dishes | Tags: , , , , | 19 Comments

Leftover Venison Meat Pies

So, I’ve been a bit off the ball when it comes to these Improv Challenges.

 Venison Pie - GB

You see, I really enjoy doing them. Makes me think outside of the box a little bit when I am coming up with recipes.

This can backfire  bit for me though. Like last month when the ingredients were heart shaped foods and flours. Problem was I use flour daily. I bake constantly and flour is not a challenge for me.  So I over thought it, and ended up panicking, and then the improv day came and went and I never managed to get anything posted.  I so could have rocked that challenge, but alas, I did not.

Ven Pot pie - GB

So for this month’s challenge of peas and carrots, I copped out a bit by using frozen peas and carrots, but still am sharing with  you an awesome recipe that I make all the time.  The recipe came about when we ended up with tons of leftovers from an enormous venison roast we cooked up for dinner.

Because venison (especially left over venison) can be a bit gamey, I make a beef gravy to go into it.  Of course if you don’t like, or don’t have access to venison, beef will work  just fine as well. These also freeze amazingly, so if you have time, a double batch will give you lots to stow away in the freezer for a quick and easy meal.

venison pot pie - GB

Leftover Venison Meat Pies

makes about 8 pies. 

  • Pastry ( store-bought or homemade) for a double crust pie
  • 1 tbsp butter
  • 1/2 small onion, diced
  • 1 clove of garlic, minced
  • 1 1/2 cups beef stock , divided
  • 2 tbsp flour
  • 3/4 cup left over venison roast, diced
  • 3/4 cup frozen peas and carrots ( I used frozen mixed veggies)
  • 1 cup shredded cheddar cheese ( optional)
  1. Preheat the oven to 350°F.
  2. Roll out your pastry to about an 1/8 in (2-3mm).  Cut out 8 5 in ( 12 cm) circles, re-rolling out as needed. Because I didn’t have a round cutter that big, so I used a bowl and the tip of a knife to cut out my circles.  Gently fold them into the cups of a muffin pan and set aside. With the remaining pastry, cut out 8 2 in (5cm) circles and set aside.
  3. In a deep pan or dutch oven, melt the butter over medium heat. Add the onions and garlic and cook until translucent.
  4. Pour in 1 cup of the beef broth and bring to a boil. Meanwhile whisk the flour in the remaining 1/2 cup of broth. Add to the boiling stock, and stir constantly, until slightly thickened.
  5. Add the meat, veggies, and cheese if using, and cook until warm.
  6. Divide the mixture between the eight prepared shells. Top with the rounds, and bake for 15-20 minutes, or until the pastry is golden.

Don’t forget to click the link to check out the other great Peas and Carrots recipes!

– Mel


Categories: Main Dishes, Pies | Tags: , , , , | 15 Comments

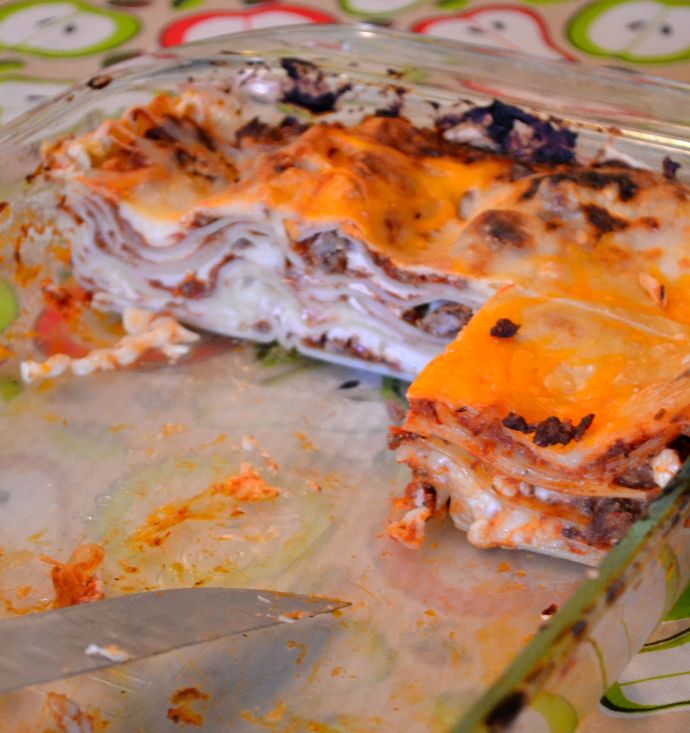
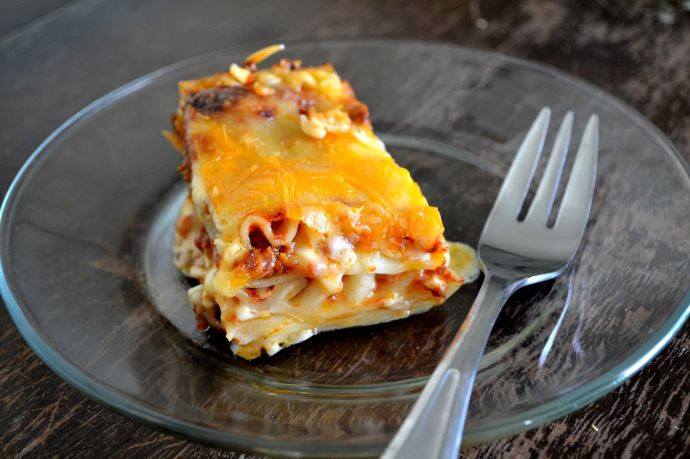
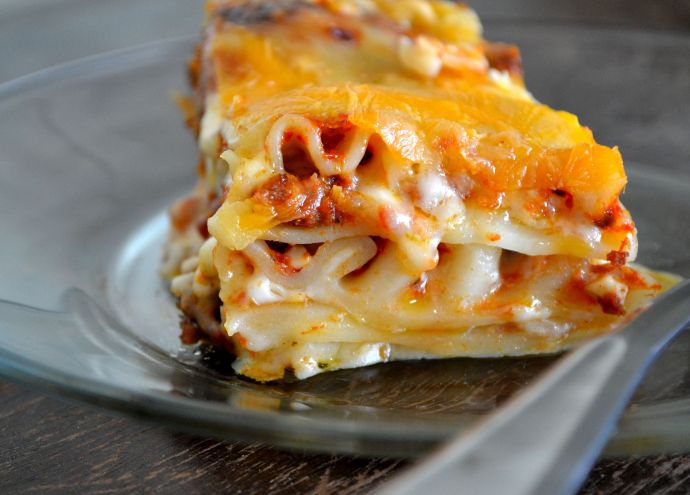
Mom’s Lasagna

Top reasons why you should make this as soon as possible:

lasagna pan - GB

1. Mom’s lasagna is amazing. No bias here. You can ask Mr. Ginge

2. It is the most requested birthday meal in our family. Mom had to implement  a rule that people couldn’t ask for the same thing because everyone was requesting lasagna.

3. Because leftovers ( if there are any) are way better the next day.

lasagna 2- GB

4. It has magical properties. It turned my pasta-hating father into a lasagna-eating fool.30 years ago. True story.

5. It is the perfect vehicle for cheese. And it’s even better with cheesy garlic bread.

6.It freezes incredibly well, so you can have surprise / spur of the moment lasagna-that-is-already-next-day-better, without having any of the work. (just don’t tell anyone it’s in the freezer….shhhhh…..)

7. Because it is the ultimate comfort food. Nuff said.

lasagna 1 - GB

Mom’s Lasagna

makes 1 9×13 pan (about 12 servings)

  • 1 tbsp olive oil
  • 1 medium onion, chopped
  • 2 cloves garlic, minced
  • 1 lb lean ground beef ( or any lean ground meat. We’ve used turkey, chicken, moose, venison. Basically, any ground meat you have on hand)
  • 1 can ( around 2 cups) tomato sauce
  • 1 box lasagna noodles, cooked according to package directions
  • 1 lb / 500gr shredded mozzarella cheese
  • 2 cups cottage cheese
  • 1/2 cup shredded parmesan cheese
  • 1 cup shredded cheddar cheese
  1. In a large pan, heat the olive oil over medium heat. Add the onions and garlic, stirring for a few minutes until fragrant and the onions are translucent.  Add the ground beef, stirring to break up and continue cooking until no longer pink. Add the tomato sauce, bring to a simmer to heat.
  2. In an ungreased 9×13 pan ( we almost always use glass), lay some cooked noodles length wise in the bottom of the pan. Spread some of the sauce over the noodles, then spread some cottage cheese over top. Sprinkle with mozzarella and  parmesan cheese.  For the next layer, lay the noodles width-wise, top with sauce, cottage cheese and shredded cheese. Repeat with remaining layers. ( I usually get about 5)
  3. For the top layer, top noodles with sauce cottage cheese, then sprinkle with mozzarella. Top with shredded cheddar cheese, and sprinkle with parmesan.
  4. Bake uncovered in an oven preheated to 350°F for 1 hour, broiling for the last 5 minutes.
  5. Remove from oven and let stand 5 minutes, then slice and serve.

Make this. Make this now.

-Mel

—————-

I linked this recipe to The Weekend Potluck , Recipe Sharing Monday, and Strut Your Stuff Saturday!

Click the links for more great recipes!

Categories: Main Dishes | Tags: , , , , , | 9 Comments

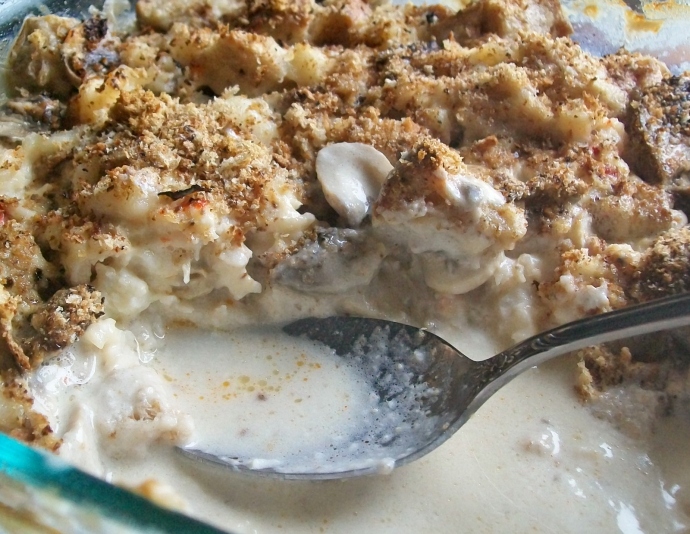
Seafood Casserole

My last car was a bit of a lemon.

And by lemon I mean I’m not sure there was a single thing I didn’t have to fix on that thing. As in I am pretty sure that Jeep saw the inside of the shop more than it saw the road.I became intimately familiar with the side of the road. CAA was my BFF. My mechanic cringed as much as I did when I was towed pulled in the shop. It never seemed to be just a simple fix.

Other than gaining a higher tolerance for the cold from sitting on the side of the road in the middle of the winter, I did gain a knack for identifying what was wrong by the sound my Jeep was making. Amazing, since I am the least mechanically inclined person there is. I don’t know whether it is a good ting or bad that I’ve been able to put it to use.

A couple of weeks ago Mr Ginge took my car in to work so that he could take it for an oil change, which left me his truck for a couple days. It started to make a funny noise like something was caught in the fan blade. I knew exactly what was wrong and texted him ( in my very accurate mechanical terminology) the following:

“pulley thing in your serpentine belt is going”

I’m not quite sure he believed me, because when he came home the next night, I had to start up his truck so that he could hear the noise.

Having replaced a couple of those on my Jeep before, I told him again ” One of your pulley things are going” he just nodded.

He drove it to work, got it to the shop and had it repaired.

Turned out, one of the pulleys had gone in his serpentine belt. 🙂

Anyway, what that has to do with this casserole is basically nothing. Other than it is rich and comforting when you have had a week of vehicle repairs. We found the recipe on the back of a box of frozen lobster we got on sale and have adapted it to suit our tastes. It’s not pretty, but it certainly is tasty.

Seafood Casserole 

serves 4-6

  • 3 tbsp butter
  • 2 tbsp flour
  • 1/2 tsp mustard powder
  • 1/2 tsp paprika
  • 1/2 tsp salt
  • 1/4 tsp fresh ground pepper
  • 1 1/3 cups milk or cream
  • 2 cups sliced mushrooms
  • 1/4 cup shredded Swiss cheese
  • 1 cup soft bread cubes
  • 2 cups cooked seafood ( crab, shrimp, scallops, lobster, or a mix works great), diced
  • 1/3 cups panko
  1. Preheat the oven to 350°F. Spray a casserole dish with no stick spray.
  2. In a small saucepan, melt the butter over medium heat. Add the flour, mustard powder, paprika, salt and pepper and stir until smooth.  Slowly pour in the milk or cream, stirring constantly. Bring to a simmer and continue to cook until thickened and smooth.
  3. Add the Swiss cheese and mushrooms, stirring until the cheese has melted. Stir in the seafood and the bread cubes.
  4. Pour into the prepared casserole, top with the panko and bake for about 30 minutes. Let set for 5 minutes, then serve.

Yummy.

-Mel

——————————————————

I linked this recipe up to Strut Your Stuff Saturdays and:

Categories: Main Dishes | Tags: , | 2 Comments

Cheesy Garlic Bubble Bread

So. Let’s talk pasta.

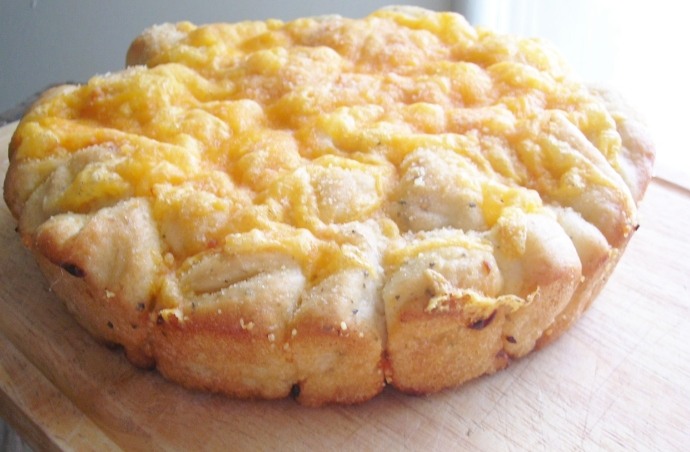
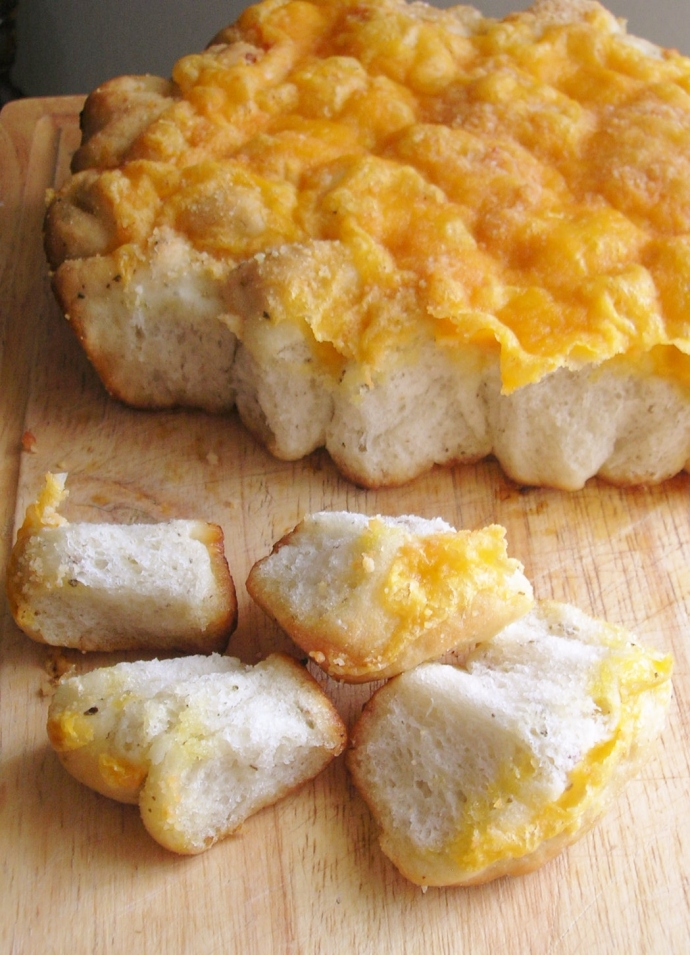
Cheesy Garlic Bubble Bread

Or, more importantly, what goes with pasta. Like bread. Garlic bread to be specific. With lots of cheese.  Spaghetti dinner is not the same without it.

Seriously, in my family, it think the pasta plays second fiddle to the garlic bread. My “I’m-not-that-hungry” sister will take a teeny tiny portion of pasta, then fill up on six slices of garlic bread. No joke.  I can hear her denials already.  🙂

Cheesy Garlic Bubble Bread

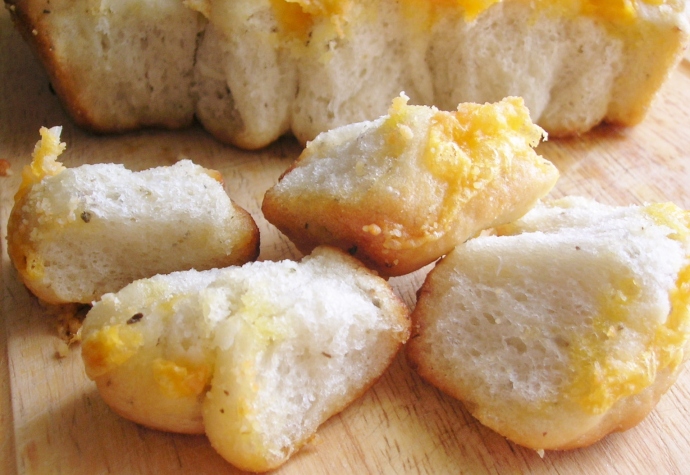
I was feeling like making bread the other day, and well bubble bread popped ( haha) in to my head. I mean seriously, I know you already eat garlic bread with your hands, but it’s way more fun to rip it from the loaf at the table.

If you aren’t feeling up to making bread, then you could always use store bought dough, just mix the Italian seasoning in with the garlic and melted butter before you dip. Make sure to snag an edge piece. Sooooo good.

Cheesy Garlic Bubble Bread

Cheesy Garlic Bubble Bread

makes 2 8” pans, adapted from my Cheddar Ranch Bubble Bread

  • 1 1/2 cups warm water ( about 40°C/ 110° F )
  • 2 tsp dry active yeast
  • 1 tsp sugar
  • 3 1/2 – 4 cups flour
  • 1 tsp salt
  • 2 tsp Italian seasoning
  • 1/2 cup melted butter
  • 3 cloves of garlic, minced
  • 1 1/2 shredded cheddar cheese
  • 1/4 cup shredded parmesan cheese
  1. Dissolve the yeast and the sugar into the warm water and let stand until foamy, about 10 minutes.
  2. In a large bowl, combine 2 cups of the flour, salt and Italian seasoning. Make a well in the middle of the bowl, then pour in the yeast and stir together with a wooden spoon. If the dough is still a bit sticky slowly add in more of the flour, 1/2 cup at a time, until you get a soft dough.
  3. Turn the dough out onto a flour surface and knead it, slowly working in the remaining flour until you get a smooth and elastic dough.
  4. Lightly grease a large bowl then set the dough in the bowl to rise, until it doubles in size ( about an hour).
  5. Meanwhile, brush the bottom and the sides of the two pans generously with some of the melted butter. Combine the remaining butter and garlic.
  6. Punch down the dough, then cut the dough into 1 in pieces, which ends up being about 30 – 40 pieces.  Dip each of the pieces into the garlic butter mixture, making sure to get some of the garlic on the dough, then nestle them into the prepared pans. You may have to squish them together a little to fit the last few pieces in the pan.
  7. Allow the dough to rise a second time, this time for about half an hour.
  8. Preheat the oven to 350° F.
  9. When the dough has risen, pop the pans in for about 15 minutes. After the 15 minutes, sprinkles the tops with the cheese, then bake for another 15 minutes.
  10. Let the bread cool for a couple minutes, then slide out of the pan and enjoy warm.
  11. If you are only going to eat one of the loaves, then tightly wrap it in some plastic wrap. To reheat, just stick in the oven for about 5 minutes or so or until warm.

Seriously, way better than pasta. 🙂

– Mel

——————————————-

I linked this post up to the Weekend Potluck, Wednesdays Adorned from Above, and Strut Your Stuff Saturdays! Click the link to check out more great recipes!

Categories: Breads | Tags: , , | 19 Comments

Steve’s Pulled Beef

Last weekend, we were fortunate enough to be invited up to our friend’s cabin for the day.

I always enjoy when we get invited up there. It’s located in an old ghost town that is only accessible these days by an old fire route. Mostly now it’s just a bunch of hunting camps, but many of the old buildings are still partially standing, and there is an old graveyard somewhere, although we have yet to find it.We were treated to a wonderful lunch( I provided the cookies 😉 ), and challenged to a friendly shoot out. Zombie targets were involved.  I’m happy to report that the paper zombies did not survive. 🙂

This is our friends recipe, and he is both a butcher and an excellent cook. We first had it on a prior visit up to the cabin. It was so good, that Mr Ginge beat me to the punch and asked him how he made it. And we’ve made it many times since we got the recipe. It’s perfect for the summer months because you just throw it in the crock pot and let it do it’s thing all day. So it doesn’t heat up your house.  Which  in last weeks heat wave, was golden.

A few notes on the recipe: A blade roast is key. I have tried it with different roast, and they either haven’t shredded or not worked nearly as well. Also, this is one of those recipes that can’t be hurried up. It really needs the full 8 hours to get all tender.

Steve’s Pulled Beef

serves 4 

  • 1 2lb boneless blade roast
  • 2 tbsp montreal steak spice
  • about 1/4 beef broth or water
  • 4 buns

optional:

  • horseradish
  • bbq sauce
  • cheese
  • onions
  1. Rub the roast with steak spice and place in your slow cooker. Pour the beef broth into the bottom, secure the lid and set to low for 8 hours. 
  2. After 8 hours, remove the roast and shred with 2 forks. If there are any large bits of fat, be sure to remove them. They aren’t very tasty. Return the shredded beef to the broth, mix, and continue cooking on low for another 1/2 hour.
  3. Slice the buns in half, pile on some meat and add your favourite toppings. I like mine with a bit of BBQ sauce and some sharp cheddar cheese.
I would like to say that this was the perfect meal to come home to after our little road trip, but sadly, I am not that put together and forgot. Oops.
-Mel
—————————————————————–
I linked this recipes up to The Weekend Potluck and Strut Your Stuff SaturdaysClick the link to check out some more great recipes!

Categories: Sandwiches and Side Dishes | Tags: , , | 3 Comments

Homemade Taco Seasoning

I hope every one had a safe and happy Halloween!

Now that it has passed, I can start gearing up for the Holidays! ( Or I can publicly start gearing up for the holidays without getting strange looks from people 😀 )

Last few days,  have been stressful enough, without throwing in the holidays! Ha!

One such stressful event happened on Saturday morning. Mr. Ginge and I planned to head down to the market for the last weekend before it closes for the season. We were meeting our neighbors and were going to head down. We we get to our neighbors house, I absentmindedly adjust my left hand ring, only to discover that is wasn’t there. My other rings that I normally wear were on my hand, so there would be no reason why my engagement ring would not be on. Instantly my heart sank. It was like a punch straight to the gut. The ring had slipped off and I had no idea where or even how long it had been missing.

So part of Saturday morning was spend crawling around on the ground , retracing my steps, trying to find my ring that could have been lost anywhere in the house, or some where between the house and our neighbors a block away. Let’s just say, you don’t really realize how much of a distance it really is until you are looking for something smaller than a quarter.   Mr. Ginge was about to send me to buy a metal detector in order to find it.

Fortunately, it was found where it has slipped off when I grabbed my shoes. It is now and secure at the jewelery store, getting sized down two sizes (no wonder it slipped off) so that we hopefully don’t have to go through this again! 

For stressful days, one of our go- to recipes are tacos. They are quick, easy, and we almost always have the fixings on hand to throw together.  Including this homemade seasoning. I like it better than the packaged stuff and it is so easily customize to your own tastes. It’s  also great as a rub on meats or fish, and I have even been known to throw it in a pot of chili in a pinch.

Homemade Taco Seasoning:

This makes about 1/2 a cup of seasoning, but is easily doubled.

  • 1/4 cup of chili powder
  • 2 tbsp dried oregano
  • 2 tbsp ground cumin
  • 2 tbsp garlic powder ( or garlic salt if you prefer
  • 2tsbp chipotle powder ( or smoked paprika if you don’t want it spicy)

  1. Dump all of the spices into an airtight container.
  2. Close the lid and shake it a few times to mix up the spices. Store in the air tight container.
  3. Use for taco meat, or as a rub, or use it to kick up your favorite recipes

To use for taco meat:

  1. Brown and drain 1 Lb of ground meat.
  2. Stir in 2 tbsp of seasoning and a couple teaspoons of water if necessary. Let cook for a few minutes.

Adapted from Kraft.
On another note, you should see the enormous sweet potatoes we picked up at the market. Perhaps this is Mr. Ginge’s way of telling me he wants some sweet potato pie?

-Mel

Categories: Misc. | Tags: , , | 2 Comments

Some Days…

Some days are just plain awesome. World-at-your-fingertips type days. Sky-could-not-be-bluer days.

And some days, while I am innocently going about my business, I am plagued a personal thunder cloud right over my head. Down-pour-rain baby, coupled with a terrible feeling in my gut.

Do you ever get that gut wrenching, stomach clenching, heart-stopping, ruin-your-day kind of feeling?

You know.

Like when your alarm doesn’t go off, and when you wake up you discover you have 5 minutes to get yourself ready for work.

Or  when you trip over your too-long pants and send your burning hot tea flying all down the front of you and half way across the room.

Or when you are faced with the disaster that is your kitchen after a marathon bake-fest.

Or when you are home alone, indulging your Food Network addiction, and the house phone rings non-stop, and you answer it only to find out it’s non other than The Bane-of-Your-Existence. Blech…..

Yeah…. you know.

This makes it all better. Promise.

I mean, what is better than the ultimate cheesy comfort food, liberally laced with the indulgence that is lobster, and loaded with butter?

Ok. Maybe a credit card with no limit and free reign of my favorite shoe store would be better. But since I don’t see that in my future, I’ll take the mac and cheese. 😀

Lobster Mac ‘n’ Cheese

Serves 4-6

  • 1 lb rotini ( or your favorite pasta)
  • 1 small onion, finely chopped
  • 1 garlic clove, minced
  • 5 tbsp butter, divided
  • 1/2 lb cooked lobster, chopped ( about 1 1/2 cups)
  • 2 tbsp flour
  • 2 cups  light cream ( I used 10%)
  • 1/2 tsp mustard powder
  • 1/4 tsp salt
  • 1/4 tsp pepper
  • 2 cups finely grated sharp cheddar cheese, divided
  • 1/2 cup panko ( or ordinary bread crumbs)
  1. Cook you rotini according to the package directions.
  2. Melt 1 Tbsp of butter in a pan, then brown the onions and the garlic. Remove from pan and set aside.
  3. Next, melt another Tbsp of butter and toss the lobster in it, cooking for a couple minutes. Set aside.
  4. In a saucepan, melt 2 tbsp of butter, then whisk in the flour to make a roux. Let the roux cook for a minute or so to cook out any “floury” taste.
  5. Slowly add in the cream, about a 1/2 cup at a time, whisking at the same time. The mixture will thicken quickly at first, then slow down as you add the cream. Add the salt and pepper.
  6. When the sauce has thickened a little, add the shredded cheese, whisking at the same time. This will prevent all the cheese from sinking and sticking to the bottom.
  7. In a oven proof bowl or casserole combine the noodles, onions, lobster, remaining cheese, and sauce.
  8. Toss the panko in the last Tbsp or melted butter, and sprinkle over the top.
  9. Bake in an oven preheated to 350 °F for about 20 minutes, or until everything is hot and the panko is browned.

Serve this up with a tasty salad, and you have a tasty ( and yes, rich) supper, that will fill your tummy with an entirely new feeling. Sheer delight.

Enjoy!

-Mel

Categories: Main Dishes | Tags: , , , | 2 Comments

An Unusual Nugget….

When we were little, we used to camp often during the summer. Sometimes we would camp in tents at a site, other times at my grandparents farm. We had a tent trailer which my parents parked out in the front pasture. Every few weekends during the summer, we would go out and visit then camp out in the trailer.

One story that comes up often, happened to me when I was about 5 years old. Mom and Dad had put us to bed, and the last thing I remember is curling up and going to sleep. The next thing I remember is waking up on the ground, outside of the trailer. So I ran around front and knocked on the trailer door to be let back in. Now this scared the bejeebers out of my parents, since by then it was late at night, and as far as they knew, we were all long asleep. Much to their surprise, they found me on the other side of the door. 😀

Another favorite is the time we ate snake. One evening, my parents thought it would be funny to play a joke on us.  When we asked what was for dinner, mom showed us the piece of meat she was preparing, and told us very seriously “Snake”  hoping to shock us. Dinner came, and she served us up these round slices of ‘snake’. Surprisingly, we gobbled it up (we were picky eaters), and later that night when we went inside to brush our teeth, we ran up to my Gran and told her all about the snake we ate for dinner.

Since then, pork tenderloin has been known as snake ( or at least has brought up this story).

Be sure to make lots, it flies (slithers?) off the plate!

Snake (a.k.a Cracker Fried Pork Nuggets)

serves 2-4

  • 1 pork tenderloin
  • 1 egg, beaten
  • 1/2 sleeve soda crackers, crushed
  • 1/2 c flour
  • 1/2 tsp salt
  • 1/2 tsp pepper
  • 1/2 tsp smoked paprika
  • oil for frying
  1. Preheat about 1/2 cm/ 1/4 in of oil in a large pan
  2. Trim your tenderloin of fat and the silverskin, then cut into medallions, about a centimeter/ 1/2 inch thick.
  3. Mix together the four, salt, pepper and paprika, then set up your breading station.
  4. Dredge each piece of pork in flour, then in egg, then in the crackers.
  5. Fry them for a couple minutes on each side until the crackers are golden and the meat is no longer pink.
  6. Drain them on a paper towel to remove excess grease.

Don’t they look sssssssssssscrumptioussssssss?

(OK…. that was awful…. 😛 )

-Mel

————————————————

It has been brought to my attention that it was, in fact, not this recipe but another one for grilled pork tenderloin that my parents told us was snake ( makes sense you know because it would have been whole….). I have just come to associate these nuggets with that story. Still really tasty and the only thing that ever gets made when we have pork tenderloin in the house 🙂

-Mel

Categories: Main Dishes | Tags: , , | 2 Comments

Blog at WordPress.com.